How to Deal with Garage Door Lockout
Hey there! So, you find yourself in a bit of a pickle, huh? Well, don't worry, my friend, you're not alone. Dealing with a garage door lockout can be a real hassle, but fret not because I've got your back. Whether you're stuck outside your garage on a rainy day or desperately need to get your car out in a hurry, I'm here to guide you through the process step by step.
Picture this: you're rushing out the door for work or an important appointment, only to find that your garage door refuses to budge. It's frustrating, isn't it? But before you start panicking or calling for professional help, let's take a deep breath and tackle this together. After all, with the right knowledge and a bit of know-how, we can get that garage door open in no time.
In this guide, I'll break down everything you need to know about dealing with a garage door lockout in plain, easy-to-understand language. No fancy jargon or complicated instructions here – just straightforward advice that anyone can follow. Whether you're a DIY enthusiast or someone who's never picked up a wrench before, I've got tips and tricks that'll help you out.
Read more about Open multiple locks with single key!
Open the Garage Door from the Inside
Alright, let's start with the basics – opening that stubborn garage door from the inside. Now, picture yourself standing in your garage, staring at a door that just won't budge. It's frustrating, I know, but don't worry, we've got a trick up our sleeves.
First things first, we're going to locate the manual release mechanism. This little lifesaver is usually found inside the garage, somewhere near the garage door opener. It's like the emergency button for your garage door – when all else fails, this is what you're going to rely on.
Now, let's walk through the steps together:
- Unlock the Garage Door: Take a quick look around the garage door's exterior to make sure there are no latches, switches, or locks that might be holding it shut.
- Move the Garage Door to the Closed Position: If the door is partially open, gently push it down until it's fully closed. This ensures that the door is properly aligned and won't cause any damage when you manually open it.
- Disconnect the Garage Door Opener: This is an important safety step. You don't want the opener trying to pull the door open while you're manually operating it. So, either remove the battery or unplug the opener from its power source.
- Find the Emergency Release Cord: Look for a red-colored cord hanging from the garage door opener track or rail. That's your ticket to freedom!
- Pull the Emergency Cord: Grab hold of that cord and give it a firm tug downwards. You should feel it disengage from the opener mechanism. That means you're ready to manually open the door.
- Open the Garage Door: With the emergency release engaged, you should be able to lift the garage door manually from the bottom. Take it slow and steady, and make sure it stays securely locked in place before you start backing your car out or walking underneath.
- Close the Garage Door: Once you've got the door open and done whatever you needed to do, gently lower it back down until it's fully closed. Then, secure it with the manual slide lock until you can find a more permanent solution.
Open the Garage Door from the Outside
Alright, so you're stuck outside your garage, and that door just won't budge. Don't worry, we've got a solution for that too. Let's get that door open from the outside.
First things first, take a quick scan around the garage door to make sure there's nothing blocking it from opening. Once you've done that, let's dive into the steps:
- Locate the External Emergency Release Kit: Look for a small lock near the top of the garage door. This lock houses the emergency release cord, which we'll be using to open the door.
- Unlock the Lock: Use the key to unlock the lock housing the emergency release cord.
- Move the Garage Door Handle: Once the lock is unlocked, you'll see a handle near the bottom of the door. Move this handle to the vertical position.
- Pull the Release Handle: With the handle in the vertical position, grab hold of the release handle and give it a firm pull downwards. This will disengage the door from the opener mechanism.
- Lift the Garage Door: Now that the release is engaged, you should be able to lift the garage door manually using the handle. Lift it all the way up until it locks in the upper position.
- Secure the Door: Once the door is open, make sure it's securely locked in place before you let go. You don't want it coming crashing down unexpectedly.
Read here about Open a frozen car door!
Open the Side Door
First things first, let's take a look at the side door and see if it's locked. Give the handle a quick jiggle to check. If it's locked, don't panic – we've got a few tricks to try.
Here's how to open the side door without a key:
- Check if the Side Door is Locked: Give the handle a gentle tug to see if it's locked. If it is, don't worry, we'll try another method.
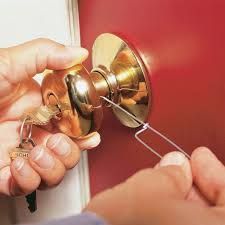
- Use the Credit Card Method: Grab an old credit card (make sure it's one you don't mind potentially damaging). Insert the card into the gap between the door and the frame, right next to the latch.
- Slide the Card Down: Slide the card downwards until it's next to the doorknob. Apply slight pressure towards the door as you do this.
- Tilt and Bend the Card: Tilt the card towards the doorknob until it almost touches it. Then, bend the card the opposite way so that it slips under the angled end of the latch.
- Continue Moving the Card: If the door doesn't open right away, continue moving the card back and forth while applying gentle pressure towards the door. This should help release the latch.
- Try Different Angles: If the card method doesn't work initially, try bending the card into a hook shape and maneuvering it to retract the latch. It may take a bit of trial and error, but with patience, you should be able to open the door.
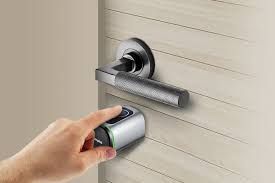
Get a Wi-Fi Enabled Garage Opener
So, you've had your fair share of manual workarounds for opening your garage door, but what if there was a smarter, more convenient solution? Enter the world of Wi-Fi enabled garage door openers – your ticket to effortless garage access from anywhere in the world.
Here's a detailed explanation of how to get and set up a Wi-Fi enabled garage opener:
- Understanding Wi-Fi Enabled Garage Openers: These modern marvels allow you to control your garage door using your smartphone or other internet-connected devices. They typically come with a small device that attaches to your existing garage door opener, adding Wi-Fi connectivity to it.
- Choosing the Right Opener: Start by researching different Wi-Fi enabled garage door opener models available on the market. Look for features such as compatibility with your existing garage door opener, ease of installation, smartphone app functionality, and additional security features.
- Purchase and Unboxing: Once you've chosen the right opener for your needs, purchase it from a reputable retailer or online store. When it arrives, carefully unbox the device and read through the user manual to familiarize yourself with the setup process.
- Installation: Most Wi-Fi enabled garage door openers come with straightforward installation instructions. Begin by turning off the power to your garage door opener to ensure safety during installation. Then, follow the step-by-step instructions provided with the opener to attach the Wi-Fi device to your existing opener.
- Connecting to Wi-Fi: Once the device is installed, you'll need to connect it to your home Wi-Fi network. This typically involves downloading the companion smartphone app and following the in-app instructions to connect the device to your Wi-Fi network.
- Setting Up the App: After connecting the device to your Wi-Fi network, you'll need to set up the companion smartphone app. This may involve creating an account, registering your device, and customizing settings such as notifications and access permissions.
- Testing and Troubleshooting: Once everything is set up, perform a test to ensure that you can open and close your garage door using the smartphone app. If you encounter any issues during setup or operation, refer to the user manual for troubleshooting tips or contact customer support for assistance.
- Enjoying Remote Access: With your Wi-Fi enabled garage opener set up, you can now enjoy the convenience of remotely opening and closing your garage door from anywhere with an internet connection. Whether you're at home, at work, or on vacation, you'll have peace of mind knowing that you can control your garage door with just a few taps on your smartphone.
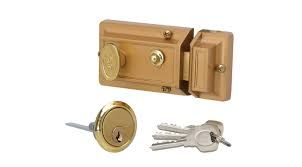
Lock Repair and Replacement
So, you've had your fair share of manual workarounds for opening your garage door, but what if there was a smarter, more convenient solution? Enter the world of Wi-Fi enabled garage door openers – your ticket to effortless garage access from anywhere in the world.
Here's a detailed explanation of how to get and set up a Wi-Fi enabled garage opener:
- Understanding Wi-Fi Enabled Garage Openers: These modern marvels allow you to control your garage door using your smartphone or other internet-connected devices. They typically come with a small device that attaches to your existing garage door opener, adding Wi-Fi connectivity to it.
- Choosing the Right Opener: Start by researching different Wi-Fi enabled garage door opener models available on the market. Look for features such as compatibility with your existing garage door opener, ease of installation, smartphone app functionality, and additional security features.
- Purchase and Unboxing: Once you've chosen the right opener for your needs, purchase it from a reputable retailer or online store. When it arrives, carefully unbox the device and read through the user manual to familiarize yourself with the setup process.
- Installation: Most Wi-Fi enabled garage door openers come with straightforward installation instructions. Begin by turning off the power to your garage door opener to ensure safety during installation. Then, follow the step-by-step instructions provided with the opener to attach the Wi-Fi device to your existing opener.
- Connecting to Wi-Fi: Once the device is installed, you'll need to connect it to your home Wi-Fi network. This typically involves downloading the companion smartphone app and following the in-app instructions to connect the device to your Wi-Fi network.
- Setting Up the App: After connecting the device to your Wi-Fi network, you'll need to set up the companion smartphone app. This may involve creating an account, registering your device, and customizing settings such as notifications and access permissions.
- Testing and Troubleshooting: Once everything is set up, perform a test to ensure that you can open and close your garage door using the smartphone app. If you encounter any issues during setup or operation, refer to the user manual for troubleshooting tips or contact customer support for assistance.
- Enjoying Remote Access: With your Wi-Fi enabled garage opener set up, you can now enjoy the convenience of remotely opening and closing your garage door from anywhere with an internet connection. Whether you're at home, at work, or on vacation, you'll have peace of mind knowing that you can control your garage door with just a few taps on your smartphone.

Install a Backup Battery
Picture this: it's a stormy night, and the power goes out. You need to get into your garage, but without electricity, your garage door opener is as useful as a paperweight. That's where a backup battery comes in handy. Let's walk through how to install one:
- Choose the Right Backup Battery: Before you rush out to buy a backup battery, make sure it's compatible with your garage door opener model. Look for a battery specifically designed for your opener brand or one that offers universal compatibility.
- Purchase the Backup Battery: Once you've determined compatibility, purchase the backup battery from a reputable retailer or online store. Ensure that it comes with all the necessary components for installation.
- Prepare for Installation: Start by disconnecting the power to your garage door opener. This typically involves unplugging it from its power source or turning off the circuit breaker connected to the opener.
- Locate the Battery Compartment: Most garage door openers have a designated compartment for installing a backup battery. This compartment is often located on the back or side of the opener unit.
- Install the Battery: Open the battery compartment and carefully insert the backup battery according to the manufacturer's instructions. Make sure to observe the correct polarity (positive and negative) when inserting the battery to avoid damaging the opener.
- Secure the Battery: Once the battery is inserted, securely fasten it in place using any included brackets or securing mechanisms. Ensure that the battery is stable and won't shift during operation.
- Test the Backup Battery: With the battery installed, restore power to the garage door opener and test its functionality. Open and close the garage door to ensure that the backup battery is providing power as intended.
- Monitor Battery Status: Keep an eye on the status of your backup battery to ensure it remains charged and ready for use. Some garage door openers come with indicators or alerts that signal when the battery needs to be replaced or recharged.
- Regular Maintenance: Perform regular maintenance checks on your backup battery to ensure its continued functionality. This may include cleaning the battery terminals, inspecting for signs of corrosion, and replacing the battery if necessary.
- Replace as Needed: Backup batteries have a limited lifespan and will eventually need to be replaced. Keep track of the manufacturer's recommendations for battery replacement intervals and replace the battery as needed to ensure reliable operation of your garage door opener.
Read more about Guide to door lock lubricant!
Conclusion
Congratulations! You've now learned a variety of techniques for dealing with a garage door lockout. Whether you're locked out from the inside, outside, or even if the power is out, there's a solution for you.
From manually releasing the door mechanism to using modern technology like Wi-Fi enabled openers, you're equipped with the knowledge to handle any lockout situation. Remember to always prioritize safety and follow manufacturer instructions when attempting DIY solutions.
By being proactive, such as installing a backup battery or upgrading to a Wi-Fi enabled opener, you can prevent future lockout scenarios and enjoy seamless access to your garage at all times.
So, the next time you find yourself staring at a stubborn garage door, you'll know exactly what to do. With these tips and tricks, you'll be back inside your garage in no time. Happy garage door opening!
Call Us Any Time!