How to Replace a Mortise Lock
Ensuring the security of your home or office starts with a properly functioning door lock. Mortise locks, known for their durability and reliability, are commonly found in many residential and commercial properties. However, over time, these locks may wear out or become damaged, necessitating replacement.
In this comprehensive guide, we'll walk you through the step-by-step process of replacing a mortise lock. From gathering the necessary tools and materials to testing and adjusting the new lock, each stage is carefully outlined to help you successfully upgrade your door security in just a few simple steps. Whether you're a DIY enthusiast or a first-time homeowner, this guide provides the expertise you need to tackle this project with confidence.
Here you can read Types of Deadbolts and How to Choose the Right one!
Gather Necessary Tools and Materials for Mortise Lock Replacement
Before you begin the process of replacing a mortise lock, it's essential to gather all the necessary tools and materials. Having everything on hand will streamline the installation process and ensure a smoother experience. Here's what you'll need:
Tools:
- Screwdriver Set: Phillips and flathead screwdrivers of various sizes will be required for removing screws and disassembling the old lock.
- Pliers: Both needle-nose and standard pliers can come in handy for gripping and manipulating small components.
- Hammer: A hammer may be needed for gently tapping the chisel during the preparation phase.
- Chisel: A sharp chisel will be necessary for removing any excess wood or adjusting the mortise pocket to accommodate the new lock.
- Drill (Optional): Depending on the condition of the existing mortise pocket, you may need a drill to make adjustments or create pilot holes for screws.
Materials:
- New Mortise Lockset: Purchase a high-quality mortise lockset that matches the dimensions and style of your existing lock.
- Screws: Ensure you have the appropriate screws for securing the new lockset to the door. If the provided screws are insufficient or mismatched, you may need to purchase additional ones.
- Wood Filler: In case there are any gaps or holes left behind by the old lock, wood filler can be used to fill and smooth out the surface for a seamless installation.
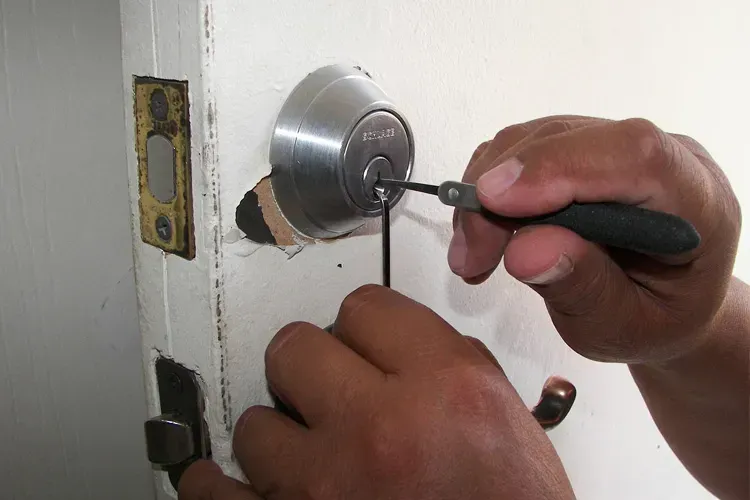
Removing the Old Mortise Lock
Before installing a new mortise lock, it's crucial to remove the old one carefully. Follow these steps to ensure a smooth removal process:
1. Gather Your Tools
- Ensure you have the necessary tools ready, including screwdrivers (both Phillips and flathead), pliers, and a hammer.
2. Unscrew the Exterior Trim
- Use a screwdriver to remove the screws securing the exterior trim or faceplate of the mortise lock.
- Keep the screws in a safe place, as you may need them later.
3. Disconnect Interior Components
- Carefully detach the screws holding the interior trim or faceplate in place.
- Once the screws are removed, set the interior trim aside.
4. Remove the Lock Body
- Locate and unscrew the screws holding the mortise lock body to the door.
- Depending on the lock design, there may be screws on both the edge and face of the door.
- With the screws removed, gently pull the lock body out of the door.
5. Clean the Mortise Pocket
- Take a moment to inspect the mortise pocket in the door.
- Remove any debris or buildup to ensure a clean surface for installing the new lock.
6. Dispose of the Old Lock
- Properly dispose of the old mortise lock and any associated hardware that is no longer needed.
Preparing the Door for Mortise Lock Installation
Before installing the new mortise lock, it's crucial to prepare the door to ensure a proper fit and smooth operation. Follow these steps to prepare the door for installation:
1. Measure and Adjust the Mortise Pocket
- Measure the dimensions of the mortise pocket to ensure it matches the size of the new lock.
- If necessary, use a chisel to adjust the mortise pocket, making it deeper or wider as needed to accommodate the new lock.
2. Clean the Mortise Pocket and Surrounding Area
- Remove any debris or dust from the mortise pocket and surrounding area using a vacuum cleaner or brush.
- Wipe down the surface with a clean, damp cloth to ensure it's free of any dirt or residue.
3. Check for Smooth Operation
- Test the door's operation to ensure it opens and closes smoothly without any obstructions.
- If the door sticks or binds, use a plane or sandpaper to carefully remove excess material from the edges.
4. Fill Any Gaps or Holes
- Inspect the door for any gaps or holes left behind by the old lock.
- Use wood filler to fill any gaps or holes, smoothing the surface with a putty knife.
- Allow the wood filler to dry completely before proceeding to the next step.
5. Verify Alignment of Strike Plate
- Check the alignment of the strike plate on the door frame to ensure it aligns properly with the latch of the new lock.
- Make any necessary adjustments to the strike plate position to ensure a snug fit with the latch.
6. Lubricate Hinges and Moving Parts
- Apply a lubricant to the hinges and other moving parts of the door to ensure smooth operation.
- Use a silicone-based lubricant or graphite powder for best results.
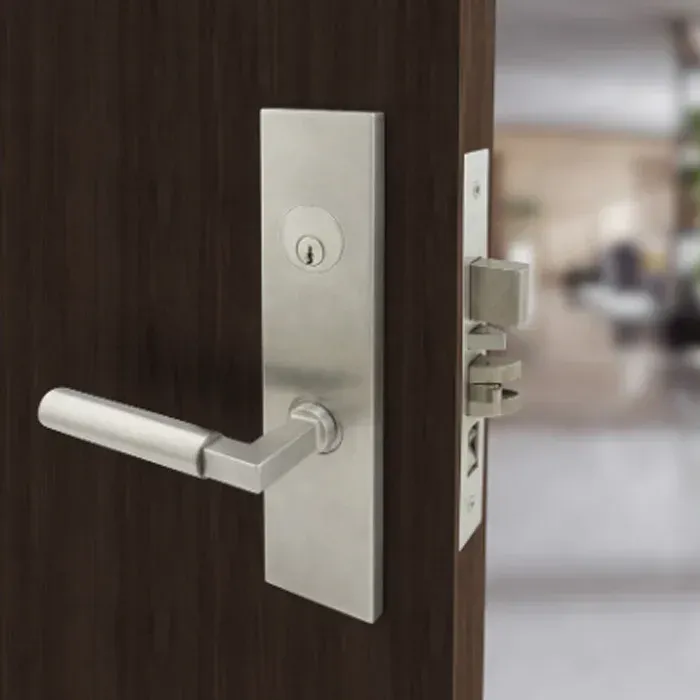
Installing the New Mortise Lock
Now that you've prepared the door, it's time to install the new mortise lock. Follow these step-by-step instructions for a successful installation:
1. Align the Lock Body
- Position the new mortise lock body into the mortise pocket on the edge of the door.
- Ensure that the lock body is aligned properly with the keyhole facing the exterior side of the door.
2. Secure the Lock Body
- Use the provided screws to secure the lock body to the door.
- Tighten the screws evenly to ensure a secure fit without over-tightening, which could damage the door or lock.
3. Install the Exterior Trim
- Place the exterior trim or faceplate over the lock body on the exterior side of the door.
- Insert and tighten the screws provided with the lock to secure the exterior trim in place.
4. Attach the Interior Trim
- Position the interior trim or faceplate over the lock body on the interior side of the door.
- Insert and tighten the screws provided with the lock to secure the interior trim in place.
5. Test the Lock Mechanism
- Test the functionality of the new mortise lock by inserting the key and turning it to engage the lock.
- Ensure that the lock operates smoothly and securely, without any sticking or binding.
6. Adjust as Needed
- If the lock mechanism does not operate smoothly, check for any misalignment or obstructions.
- Make any necessary adjustments to the lock body, trim, or strike plate to ensure proper operation.
7. Lubricate Moving Parts
- Apply a small amount of lubricant to the keyhole and other moving parts of the lock mechanism.
- This will help ensure smooth operation and extend the life of the lock.
Testing and Adjusting the New Mortise Lock
After installing the new mortise lock, it's essential to test its functionality and make any necessary adjustments for optimal performance. Follow these steps to test and adjust the new lock:
1. Test the Lock Mechanism
- Insert the key into the lock cylinder and turn it to engage the lock.
- Test the lock by turning the key in both directions to ensure it operates smoothly.
- Verify that the latch extends and retracts smoothly when the key is turned.
2. Check Alignment with Strike Plate
- Close the door and test the alignment of the latch with the strike plate on the door frame.
- Ensure that the latch aligns properly with the strike plate and engages securely when the door is closed.
- If necessary, adjust the position of the strike plate to achieve proper alignment.
3. Adjust Latch and Strike Plate as Needed
- If the latch does not align properly with the strike plate, adjust the position of the strike plate accordingly.
- Use a screwdriver to loosen the screws holding the strike plate in place, then reposition it as needed.
- Tighten the screws securely once the strike plate is properly aligned with the latch.
4. Test Deadbolt (if applicable)
- If your mortise lock includes a deadbolt feature, test its operation by turning the key to extend and retract the deadbolt.
- Verify that the deadbolt engages securely when locked and retracts fully when unlocked.
5. Lubricate Moving Parts
- Apply a small amount of lubricant to the keyhole, latch, and other moving parts of the lock mechanism.
- This will help ensure smooth operation and prevent premature wear.
6. Test Multiple Times
- Test the lock multiple times to ensure consistent and reliable operation.
- Pay attention to any signs of sticking, binding, or unusual noise during operation.
7. Make Final Adjustments
- If you encounter any issues during testing, make final adjustments as needed to address them.
- Double-check the alignment of the latch with the strike plate and make any additional adjustments as necessary.
Conclusion
Replacing a mortise lock may seem like a daunting task, but with the right tools and guidance, it can be a straightforward process. By following the step-by-step instructions outlined in this guide, you can upgrade your door security in just a few easy steps.
From gathering the necessary tools and materials to removing the old lock, preparing the door, installing the new lock, and testing its functionality, each stage of the process is crucial for a successful outcome. By taking your time and paying attention to detail, you can ensure that your new mortise lock fits properly, operates smoothly, and provides reliable security for your home or office.
Remember to test the lock multiple times and make any necessary adjustments to ensure optimal performance. Regular maintenance, including lubricating moving parts, will help extend the life of your lock and keep it operating smoothly for years to come.
With your new mortise lock in place, you can have peace of mind knowing that your door is secure and your property is protected. Thank you for choosing to follow this guide, and we hope it has been helpful in your lock replacement journey. If you have any questions or need further assistance, don't hesitate to reach out to a professional locksmith or hardware expert.
Call Us Any Time!